
Learn how to make miniature dollhouse furniture, mini paper accessories and get techniques, tips and monthly tutorials.
Saturday, March 24, 2012
LINK, LINK AND LINK
No, I don't mind if you link any part of my blog to your blogs, forums or any other meeting place. That is why I do this. Use the tutorials for your club meetings. Make a club from the tutorials.
Let's just keep this going. With the economy the way it is all hobbies are going to suffer. I want you to be able to keep going on this one.
Spread the word and let's keep making the minis!!
TTYL Kris
Let's just keep this going. With the economy the way it is all hobbies are going to suffer. I want you to be able to keep going on this one.
Spread the word and let's keep making the minis!!
TTYL Kris
Friday, March 16, 2012
DOLL HOUSE ROLL TOP BREAD BOX TUTORIAL - How to make a doll house roll top bread box from mat board.

I was asked to make a roll top or tamboured bread box, that worked.
This is the result and I hope you enjoy it.

If you want to try out my oak faux bois you will need a base color the color of oak. I am forever mixing paint and for this is used Delta's Dunes Beige, Folk Art's Morning Sun, it's a soft yellow and Folk Art's Teddy Bear Tan. THE AMOUNTS SHOWN ON MY FANCY PALETTE DO NOT REPRESENT THE AMOUNTS USED IN MIXING THE COLOR. If you have some oak to copy from, whether it be stained or not use it for color.

I've painted a piece of mat board and a piece of card stock with two coats of the base color I mixed.
The piece of mat board is probably 5" x 6". The piece of card stock can be smaller.
*****Do you see the red cap on my paint? I do this to keep the paint wet so I can use it later.

For the graining I used a 1/4" wide brush. My brush is old and it's bristles are separating. That's good for this.

I used Delta's Autumn Brown for the graining. Not much to say except to drag the brush, lightly, across the mat board, squiggle it a bit.
Don't forget to paint the piece of card stock, too.

As I mentioned earlier, you can just paint the finished bread box. If you do that you will have to paint a small piece of mat board to cut the tambour strips from. We want them painted before we put the bread box together.

I've shown you these before. These are the sponges I use. I get them from Micheal's, in the artist's department.

To use the sponge get it wet, wet. Squeeze out the water. Roll the sponge in a rag to get more water out of it. What you have now is a sponge that is pliable but not wet.

I used the Autumn Brown mixed with a glazing medium to sponge over the grained mat board.
Make sure you dab off most of the paint on a scrap of paper before you start dabbing onto the mat board.
Don't forget to do the piece of card stock.

This is the glazing medium I used.

After you have the mat board and card stock painted spray a couple coats of clear satin finish, I use the brand Krylon.
There's the piece of mat board painted white for a white bread box. If you are not using the faux bois just follow the instructions ignoring the "wrong side" and "grain" parts.

These are the pattern pieces. As always, copy them into a program that allows you to change size. When the 1 inch square prints out and measures 1 inch you have the right size.

I've cut my patterns out.
On pattern A I have a strip that I glued on. I incorporated that into the pattern. This strip holds the legs together at the right distance apart. It also helps with holding the pattern when you are tracing it.

I cannot say this enough, when tracing keep your pencil sharp!

Trace 4 of pattern A.
Trace on the back, make sure the "grain" of the faux wood is horizontal. I did not pick out a pattern on the "wood" to cut. I just let it happen randomly.
***Do you notice I turned my pattern for two of them? We have a right and wrong side to the mat board so we have to do this.

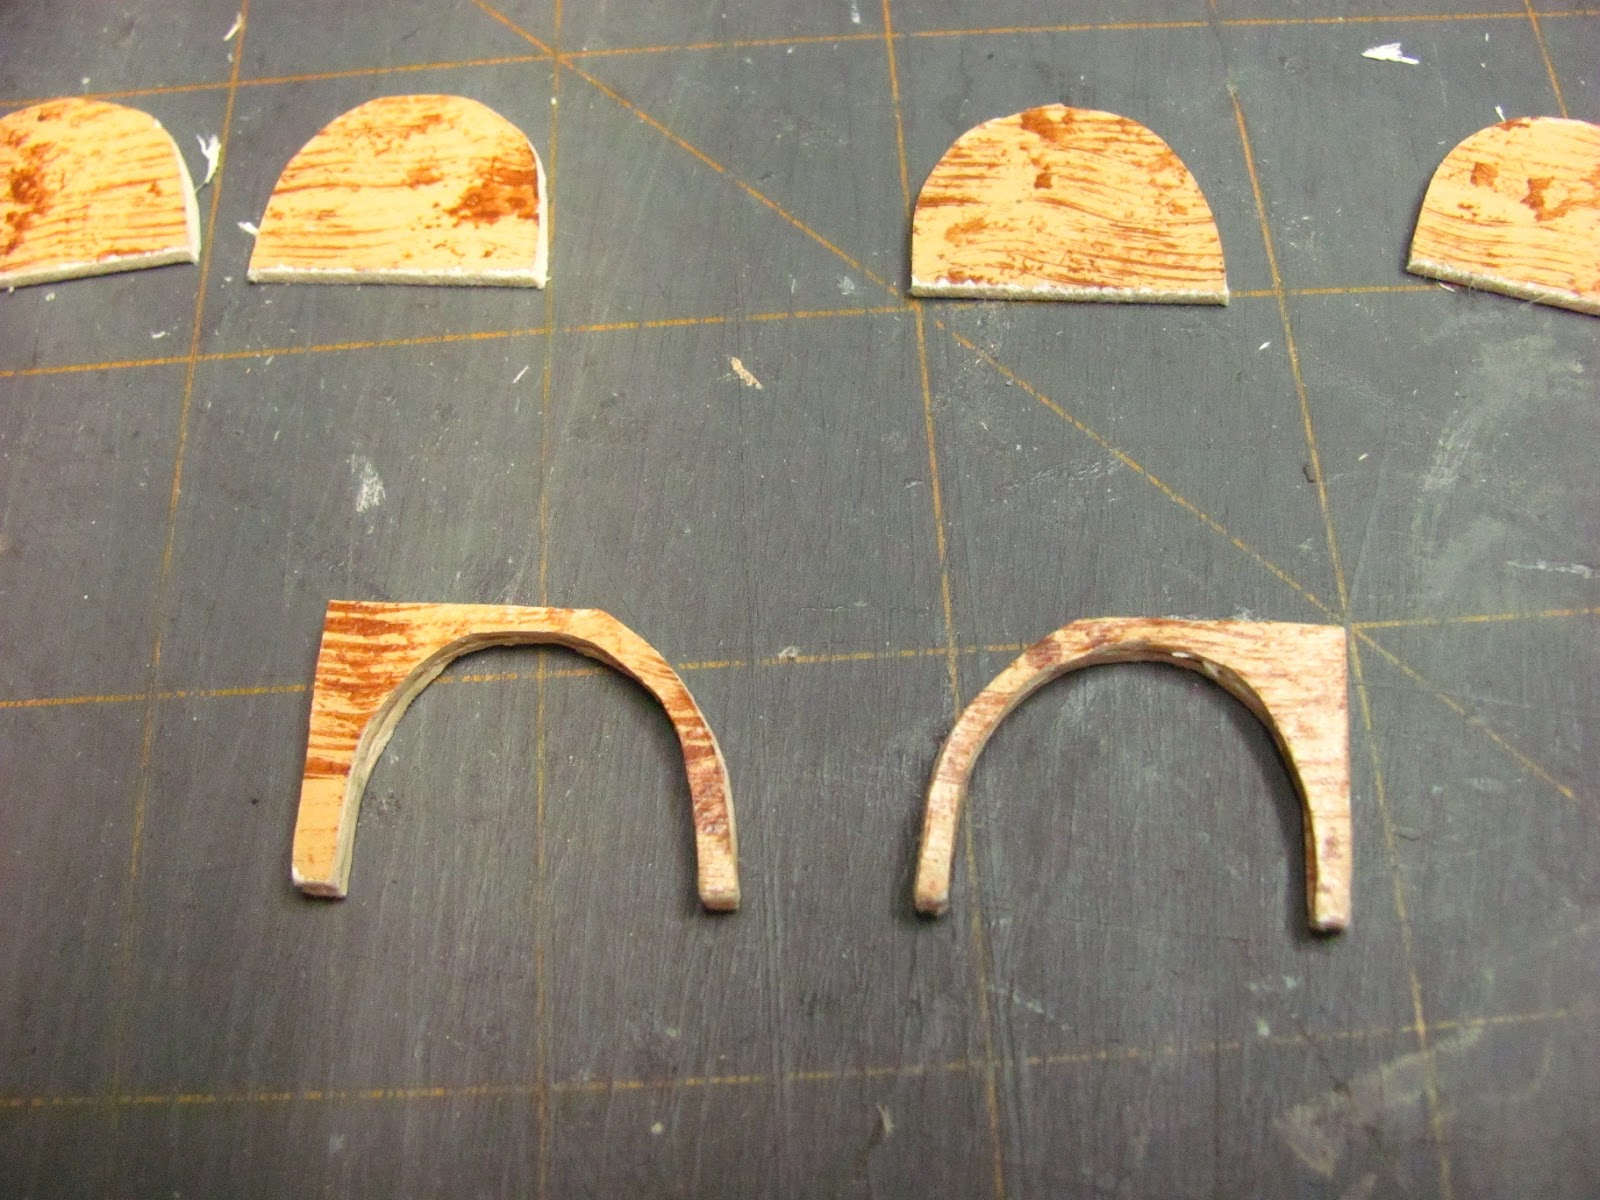
I found cutting the center out first was easier for me.
Save the center, we use it.
****When you cut, use a light touch at first, just barely cutting through the top. Add a little more pressure with each cut. I did not use my saws with this, I used the craft knife. Take it slow, use a light touch and you should do fine.

I have one set cut out.

I have all four sets cut out.

Use yellow carpenter's glue.
Glue two of the same pieces together.
I have two glued together in this picture.
Now, I have the other two pieces glued together.

On the back side of one of the centers draw a line about an 1/8" away from the edge. No more than an 1/8".
We are beginning to make the channel or track for the tambour to slide in.

Cut this extra off. You can use scissors for this . . .Yeah!!
Use this piece to trace onto the other 3 centers and cut the extra off of those, too.

As you did with the first shapes, glue these shapes together, 2 each.

Trace the Pattern B onto the wrong side of the painted card stock, wood grain going horizontal.

I have my card stock sides cut out.

Glue the two pieces you cut out earlier onto the plain side of the card stock. Center the middle so that the channel is equal all the way around.
You have both sides showing wood grain.

Draw a rectangle onto a piece of fabric, I used muslin.
This has to be square, the sides perpendicular to the top and bottom. I used my square to draw this.
This size should be 1-7/16" x 7/8".

Apply a line of glue onto the lines of the rectangle.

I used my finger to smear the glue a bit and force it into the weave of the fabric.
Set this aside to dry.

We are going to make the strips for the tambour or roll top.
First make sure your grain is going the same way as we are drawing the lines.
I made both 1/16" and 3/32" strips for tambours. I liked the 1/16" better. The choice is yours.
I used a ruler to mark the top and bottom of the mat board. Used the ruler again to drawn the line.
I did not use a ruler to cut the strips. I found that I, and this is just me, but I found that I cut the strips better just drawing the craft knife over the line lightly and slowly. I did not bevel or tilt the craft knife as much either. Take your time, go slow, cut a little bit at a time.
I cut 15 to 18 strips, extra strips just in case I didn't like a few. I think the tambour took 13 strips.

I do apologize, I was concentrating so much with the cutting and then the gluing that I didn't stop to take a picture of the strips or of me gluing them onto the fabric.
Cut the rectangle of fabric out.
Glue the strips onto the fabric. I used yellow carpenter's glue. Make sure you wipe the glue from the sides of the strips. We want the tambour to bend, like I am showing here.

This is the front of the tambour or roll top.
You see I have some rejected strips on the side.

Find the center of the second strip on the front and mark with a "T" pin.

You can use any decorative knob you might have. I am using one made from a decorative toothpick.

Shave, using the craft knife the middle.

Use a file to smooth out the stem. Use the file to cut the knob away from the toothpick by filing at the end to make a bit of a point. The point will make it easier to insert into the hole we are about to drill.

Use consecutively larger bits to drill a hole for the knob.
Drill through the fabric. I would also try to trim the fabric away a bit. It's hard poking the knob through the fabric.
Dry fit to see if your knob fits the hole.
Glue your knob into the hole.

Now, we are on to the tricky part.
The tambour or roll top needs to slide freely, but not so freely that it jumps out of the track we made. We are dealing with miniatures and we don't have the luxury of full-size measurements.
Ideally I want to split 1/16", that's a 32nd extra space for each side.
Put the tambour into the track of each side. I am measuring 1-1/2" from outside to outside. I want to add a 1/16" to that.
I also want to have a decorative edge on the front and sides of the bread box. That generally takes up about a 1/16" for each side. So, I am going to add 3/16" to the 1-1/2" I am measuring. I will cut a piece of mat board 1-11/16" in length for the bottom. Next, we are going to measure for the side.

Now my ruler is at the side, it looks pretty close to an inch to me.
Remember, I want to add a 1/16" for a decorative edge to the front.
So I will cut the width 1-1/16".
I am showing you this just in case you want to make your bread box a different size or yours isn't coming out the same size as mine. That's fine, we all trace and cut differently. With me showing you how and why I am measuring the bread box you can do this on your own.

Sand, I used 120 grit, the edges of the sides round. On the inside of the sides I sanded just the curved part. On the bottom I sanded one long side, the front, and the two short sides.

I glued one side onto the bottom, 1/16" away from the edge. Ideally that's where my sanding stopped.
Put the tambour into the other side's track and glue the side onto the bottom.
Let the glue set up a bit. Try sliding the front. If it won't slide, you are probably too tight and you will have to make another bottom, just a little longer.

I've got the tambour in and so far it's sliding.
The sides have to be perpendicular to the bottom. If the sides get narrow, the top won't slide. If the sides widen out the front jumps the track.
To keep the sides the same width apart measure between the sides at the front.
Look at the sloppy measuring!! I must have moved my ruler when I took the picture.
Anyway, measure between the sides. Looks like I've got a little over 1-1/4", I would have liked to have a solid measurement, but I'll have to go with this.

Next, measure the top of the bread box.
Looks like it's measuring 5/8".
O.K., I'm gong to cut a piece of the painted mat board, with the grain going the same way as the front a little over 1-1/4" x 5/8".
I am going to dry fit this between the two sides at the front to see if it fits. I might have to trim, when it does fit glue it between the sides at the top. I put a piece of card stock on top of the tambour to keep from gluing the top to it. If it's glued that will make the front not slide so well, LOL!
When you get that width right cut another piece the same for the back. Measure the inside the hole that was made when you glue the top on and cut the back piece. Set this aside for now. Leaving this out gives you a place to hold the bread box when you are painting the edges.

I have cut another piece and glued it to the top we just glue in. I think it finishes the top.
I sanded one long front and the two short sides.
I wish you could see that the front is really sliding, so cool!

I've gone back to my base coat that I had under the red cap.
I have painted the sanded edges, I painted twice, sanded smooth and painted one more time.
I then took the 1/4" brush and applied some graining to the edges.
After that I painted a coat of acrylic varnish on the edges.
One note: If you want you could paint in between the strips. When the tambour is bent you can see the inside of the mat board.
I think this would make a great candidate for a laser kit and be a great class at a show. Pass this on to someone that has that kind of capability.
Happy Spring to everybody!!
Have fun, expand on it, make it better . . . . . Just keep making minis!
TTYL Kris
Friday, March 9, 2012
Top of the Baker's Rack
O.K., This is not easy but here goes . . . The vertical pieces are florist's wire, not the covered kind, the "Bright" kind, it's bare and silver, can't remember what gauge. I made forms for the curved part and bent the wire in the forms. The flower at the center is easy, it's a paper punch and then shaped with a stylus. The shelves were supposed to be cut and holes drilled for the wire, they were. I got excited over getting the top all put together and spray painted the whole thing flat black. OOPS!! Wanted the shelves stained. I had to cut the shelves out of the assembly, was not going to remake this thing. Got them cut out. So the result was now thin slices of wood holding the wires in line. Now, to the sides. This was accomplished by sawing bass wood paper thin. Making forms again, two of them. Soaking the paper thin wood in hot, hot water and placing them into the forms to dry. After they were dry I took them out and put them back in with glue between the layers, this is laminating. We did this with the marble topped wine rack using card stock. After the glue was dry I took the shapes out and glued them together and glued them to the back. Then I glued new stained shelves into the assembly.
Tuesday, March 6, 2012
NEAT HOUSES
I love the fairy tale type houses. I have always wanted to build one. I want to live in the Hobbit house. I found a cool site for you all to look at and plan your next project. aboveallhouseplans.com
On the left side of the site, scroll down in the reddish/purplish margin, find the "Designer's Planning E-Book". Right below that is a list of the house designs. I can't remember which category the "Gretel" is in, but it's so cute. Kris
On the left side of the site, scroll down in the reddish/purplish margin, find the "Designer's Planning E-Book". Right below that is a list of the house designs. I can't remember which category the "Gretel" is in, but it's so cute. Kris
Sunday, March 4, 2012
THANK YOU
Everyone needs to go to FabSabbyRoses and see the kitchen cabinets she made.
That's the best "thank you" any follower can give me! To see one of my projects recreated so beautifully shows me that I am writing the tutorials so that my projects can be made.
My followers just keep me going . . . . . . Kris
That's the best "thank you" any follower can give me! To see one of my projects recreated so beautifully shows me that I am writing the tutorials so that my projects can be made.
My followers just keep me going . . . . . . Kris
Subscribe to:
Posts (Atom)