

I haven't made a piece of furniture in a long time so I thought I would make a buffet for you.
You'll notice that I have made the door and drawers open. I haven't done this before because it's not easy, easy. If you read through the tutorial and take it slowly you will have a finished buffet, too.
I have a old piece of paper pottery in the kennel.

I have put a basswood top on the buffet and used Houseworks' wooden knobs.
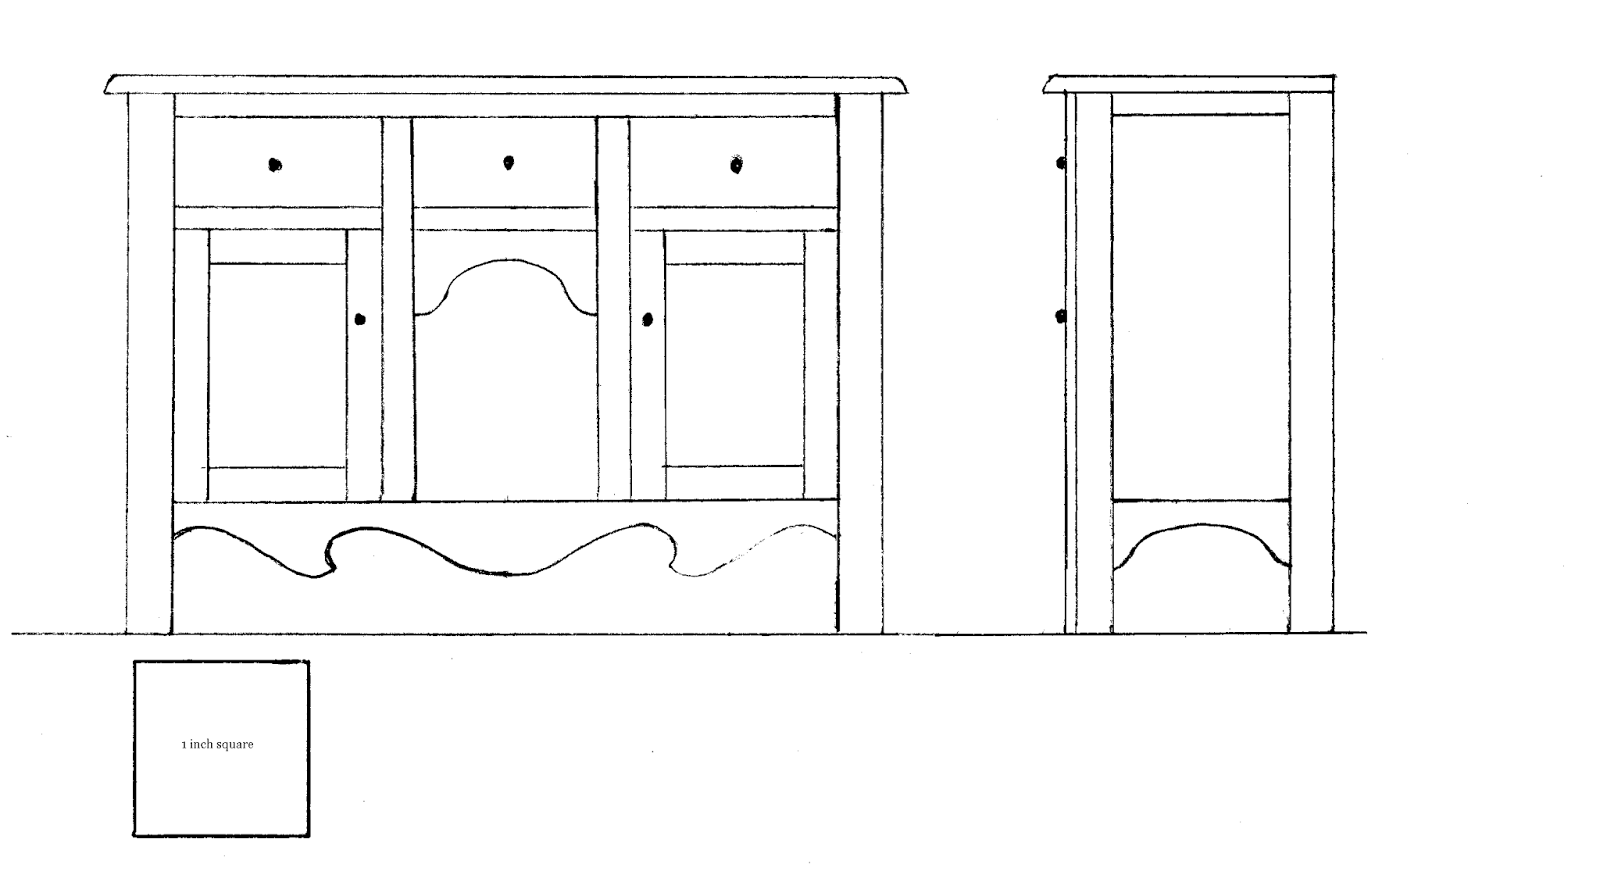
This is my drawing of the buffet. When I make a piece of furniture I begin with a scale drawing to measure from. Follow the directions found in the list at the left of the blog, "Things to do, Things to see", HOW TO RE-SIZE PATTERNS. I would make two copies one to use and one to cut the scroll work out and use to trace.

I buy most of my miniature stuff from Hobby Builders at www.miniatures.com and from Micro-Mark at www.micromark.com.

After trying to cut the strips I needed to make the buffet I found that I could not cut a strip without making a beveled edge with the craft knife. We can work with a beveled edge when we are cutting out the larger pieces, not the strips, they need to be accurate and with flat edges. We don't have a lot of surface to glue to so we can't cut it down by beveling. I have mentioned that you try to buy a mat board cutting system. This is available from Michael's or art stores. I also found something in Micro-Mark that would do the same thing for you. If you do decide to purchase this I would advise also purchasing the #24 blades. I think the mat board is harder to cut the balsa wood. For this tutorial I am using my saws.
I go through my drawing and make a list of the sizes of the strips I need to cut. I do this so that I set my saw or cutter once for each size. Sometimes it's hard to get the saw re-set to same width I had before. I am adding up the lengths of all the strips of one size to be cut apart to size. I am adding extra for mistakes but you may want to cut extra.
Cut Sheet-
1/2" wide - 10'' long-- this is for the decorative scrolls on the bottom, the kennel and the bottom of the sides.
1/4" wide - 18" long
3/16" wide - 30" long
1/8" wide - 18" long
These are the strips you will need to build the cabinet face, sides and doors.

I make the face frame first. I will use this to measure everything else from.
Trace the bottom scroll onto a 1/2" strip and cut out with your craft knife.
Measure for 2 pieces of 1/4" wide strip for the sides of the face.
Measure for 1 piece of the 1/8" strip for the top of the face. This piece and the bottom scroll should be exactly the same.
Use yellow carpenter's glue to glue everything together.

Measure the drawing to place the bottom scroll.
The 1/8" strip is glued at the top between the 1/4" side strips. The edge should be flush with the ends of the sides.

Measure for the length of the uprights, these are cut from 3/16" strips.
You can also now use the face frame to measure from. Measure between the top of the scroll and the bottom of the 1/8" strip.
Cut 2 strips.

Use the drawing to measure for the placement of the uprights and glue in.

Use another 1/8" strip for the bottom of the drawer openings.
Measure between the openings and cut to length and glue in.

The pieces have been glued in and the face frame is complete.

This is a low beam square, I bought it from Micro-Mark to cut the mat board square.
Keeping your piece square is important and makes a much more satisfactory piece.
The strip is being cut for the back and sides. The measurement is 2 7/16" by the length of the front and 2 sides. Cut yourself a little extra.

This strip is laid under the face frame flush with the top.
Mark along the top edge of the 1/8" drawer frame.

Also mark along the top of the scroll.

Before I cut apart this strip I drew the lines all across.
I want you to read the next entry before you cut the pieces apart.
Here are the back and two sides cut.

I've put the drawing back in to talk about measuring. You have to think ahead when making furniture. Look at the drawing on the right side of the diagram, this represents the side of the buffet. Do you see the narrow line drawn at the left side? This is the 1/16" of the mat board face frame, don't include that in your measurement. You want to measure from the right side to the left, not including the face frame. That's the width of the sides. You should be somewhere around 1 7/16". You've all ready cut the height. Cut two.
For the back you need to think about how the pieces are glued together, what edges are going to be glued. The sides will be glued to the cut edge of the back, so we subtract 1/4" from the face frame measurement. Why? Because we are starting out with a 1/16" thick piece of mat board and adding a frame to it made of some more 1/16" mat board, together that equals 1/8". We have two sides, 1/8" plus 1/8" equals 1/4". So whatever you measure the face frame's width, subtract 1/4".
I hope that's clear. If you can get this you can makes lots and lots of furniture from here.

The sides are cut out and I've turned them over so that the lines that were drawn are facing the table.
From a 1/4" strip cut two the height of the buffet.
From a 3/16" strip cut two the height of the buffet.
Glue to the sides with the edges flush.

From an 1/8" strip measure and cut the top for both of the sides.

Glue both of the tops onto the sides.

Use a 1/2" strip to trace the bottom scroll, cut out and glue to the bottom of the sides.

Glue the sides to the back. The sides are glued to the cut edge of the back.
Check things out with your square.
Do you see on the left where I remove a glued piece, I wasn't thinking ahead!

Measure the depth of the sides now, they should be 1/16" less because of the thickness of the back.

The next two pieces are the shelf for the drawers to sit on and the bottom. You've measured for the depth in the previous step, the width is the same as the back. Cut these out.

The shelves are glued in, make sure you can see the line on top of the shelf. When you drew the line you were above the mat board by a pencil line's width, so you need to glue just below the line.

These shelves should be flush with the top edge of the bottom and the drawer openings.

I am measuring for the strip that's going to be used for the drawer fronts.
Leave a little room, not a large gap, but you need some sliding room for the drawer fronts.

I've cut the strip, I think I've got it a little tight I should trim.
I don't like sanding small pieces, you can get lop-sided very quickly.
Set this aside.

Now, I am measuring for the doors, measure the width. You will want to leave a small space, not quite a 1/16", for the door to be able to open and close smoothly. I am going to use "pin" hinges and we need room for the door to swing. Trial and error until you get the feel of making things like this. I still have to re-make doors sometimes.

Measure for the length of the doors.
Give yourself a little space here, too.

I've cut the strip for the two doors and I am measuring for the width. Remember you want a small space left for the doors to swing.

The doors have been cut.

Using the 3/16" strips cut four the length of the doors. and glue on with the edges flush.

Measure between the pieces you've just glued on.

Cut from 3/16" strips the top and bottom to the door and glue on.

The doors are done.

Place the face frame up to the cabinet and mark behind the 3/16" uprights. This measurement is for the dividers between the cabinets.

To help with marking I've cut a little piece of mat board the width of the cabinets from the sides.

Placing the measuring stick at the side of the cabinet I made marks on the bottom, back and top of the inside. These marks will help me to align the dividers.

I am measuring the height for the dividers.

I've cut the strip and now I am measuring for the depth.
It's the same as the shelves and if I would have thought ahead I could have had a strip of this all ready to cut.

I've got the dividers glued in.

Set the face frame up to the cabinet. We are going to mark for the drawer dividers. These will keep the drawers sliding straight and not wobbling around.

I've made lines on either side of the face frame. These dividers will be flush with the edge of the frame.

I am measuring for the height for the dividers.

I am measuring for the depth of the dividers.

I've glued in the dividers.

Set your face frame up to the cabinet and check to see if all of the dividers are flush the the sides of the face frames at the drawers. Move them if they are not.

Let the glue set up a bit and paint your cabinet parts.

I will paint and sand until I am happy with the surface. I will sand with 220 grit and finally with 300 grit.
Be sure to brace the mat board with your fingers when sanding to give it support.
Glue the face frame to the cabinet after you are done painting.

To be able to hold onto the doors for putting in the hinges I've pushed pins into the spot where I will put the handles.

For handles I am using Houseworks wooden knobs.

These are available from Hobby Builders.

To keep the doors from pushing too far into the cabinet cut tiny strips to be glued 1/8" away from the seam where the face frame meets the cabinet.

Place the door into the opening leaving a gap at the side opposite the handle.

I started a hole with a large pin, like a "T" pin or corsage pin. This hole is made in the seam between the cabinet and face frame.
I used a pin vise and drill bits to drill the hole. This pin vise and drill bits I purchased from Hobby Builders.
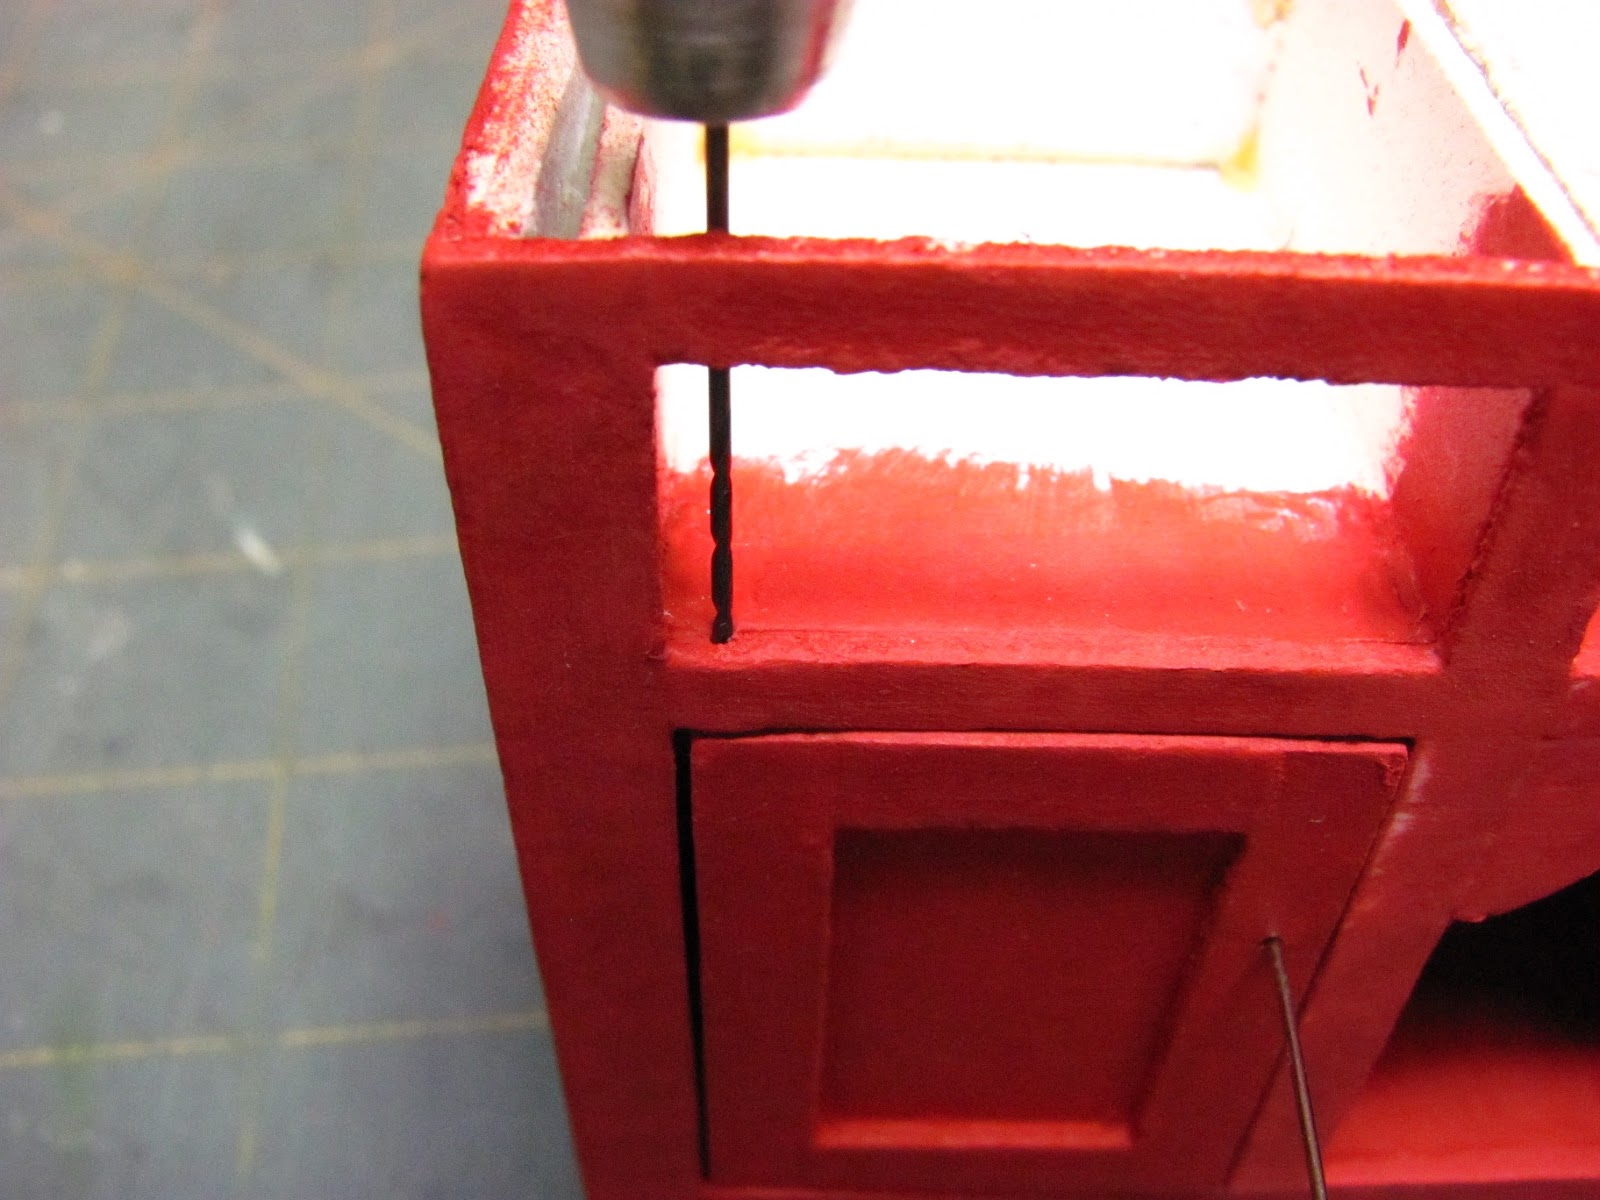
A closer picture of what I am doing.
The pin should have gone through to the door to make a mark for you to drill the hole in the door.
Don't drill through the cabinet into the doors.

Drill the holes into the doors separately not while you are drilling through the cabinet.
I use straight pins for the hinges.
I have the pins inserted through the cabinet and into the doors.

Check to see if they work smoothly.
I've had to re-make doors and I've re-drilled so many holes that I've have to glue toothpicks into the holes to make more wood to drill into.
Don't cut the straight pins off just yet.

I am measuring the strip of mat board that is for the drawer fronts.
I have it butted up against the inside of the opening and marking the other side.

I've cut the first one.
I am going to have to sand these fronts, leave a very small space around the opening.

I've got all three cut.

Because there might be slight differences mark your left and right drawer fronts. Yes, the middle one is smaller.

Measure the depth for the drawer bottom and subtract a tiny bit more than a 1/16". The 1/16" is for the back of the drawer that will be glued to the cut end of the drawer bottom

I've got the strip cut for the drawer bottoms and I am using the drawer fronts to measure the width.
I also have a couple of strips for the backs. They should be the same height at the drawer fronts.

I am using the low beam square to cut the drawer bottoms.
It's late and my husband is sleeping and I don't want to run the saw. We'll see how well I do with keeping the blade straight!

Here are the back, bottom and front of the drawer ready to be glued.

Glue the front and back to the cut edge of the bottom.
If you can, try this part of the drawer in the opening to check if the bottom is the right depth. The drawer front should be flush with the face.

Here they are so far.

I am measuring for the sides of the drawer.

I've got the strips cut for the sides of the drawers.
I am measuring for the length.

The sides of the drawers are glued on top of the bottom and between the front and back.

I measuring for the top. I would like to have a 3/32" lip on the sides and front. Top will be flush with the back.

I am measuring for the depth. Remember the back will be flush with the back of the cabinet.

I am using a 3/32" thick piece of basswood. I used my square to line up the craft knife and cut a deep line. I then moved the square and made a few more slices with the knife and the wood was cut.

Here is the top. It's easier to cut with the grain of the wood that crosswise, but at least we can cut it with a craft knife.
You can see that I have a beveled edge. I sanded that flat before I sanded my front and sides quarter round.

I've sanded the front and sides of the top quarter round.
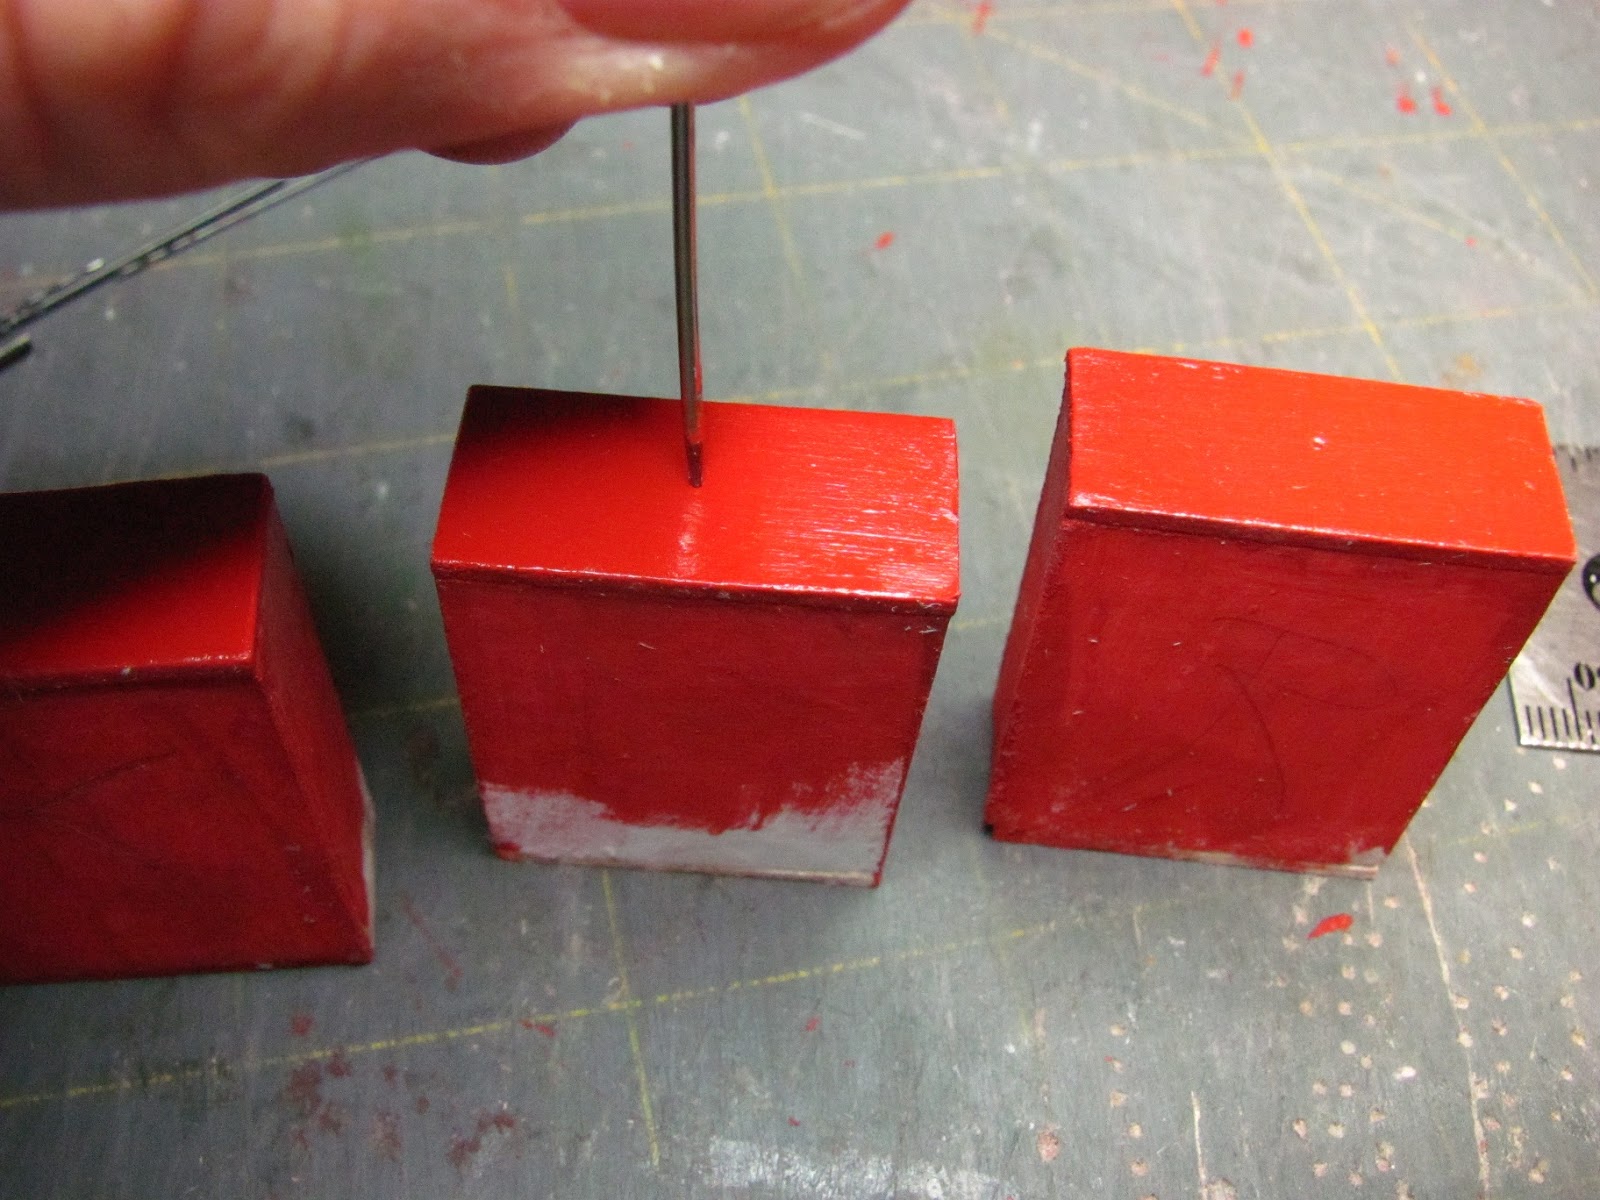
I am using a large pin like a "T" pin or corsage pin to make a hole in the center of the drawer fronts.
You don't see me doing it here, I am holding the camera in one hand and holding the pin in the other, but please support the drawer front when you are making this hole and drilling.

The holes are being drilled.

I've drilled the hole for the knob on the doors.
Use wire cutters to cut the straight pin in half.

Put the pins in the top holes.

Put the door into the cabinet, sliding it onto the pin.

Put the bottom pins into the holes.

In between building the cabinet I've been sanding and painting. I also applied a coat of acrylic finish.
Now, I am applying a dirty wash of dark brown paint mixed with acrylic thinner. I brush on and wipe off.
You can stain and apply finish to your top. I just applied a clear finish to the knobs.

When everything is good and dry I buffed it with a wadded piece of brown paper bag. Be careful, support the mat board and watch those fingernails.
When you are happy with the finish glue on the top.

There is a good description of an aged finish in the tutorial "How to make a kitchen dresser from mat board."
I hope you try this out. I know it's not quick and easy but it's well worth the time. After this you can start to design your own furniture. Add a top to the buffet and make it a hutch.
This is built just the way I would build a wooden piece. I would change the thickness of the face frame, back and drawers to 1/8" thick basswood. I would leave everything else the same.
Until next time,
Have fun, Expand on it, Make it better . . . . . .
Just keep making minis