
Learn how to make miniature dollhouse furniture, mini paper accessories and get techniques, tips and monthly tutorials.
Monday, June 22, 2015
Getting the top off
When I watched Al take the top off the febreze can he put the can on his knee and in his other hand he twisted and pushed down the top, it popped off. I hope this helps.
Thursday, June 18, 2015
MODERN DINING SET TUTORIAL - How to make a modern dining set from an air freshener cap.

My husband, Al, sometimes sits with me in the breezeway where I make miniatures.
A few weeks ago he noticed my can of Febreze and said that the top looked like a chair.
What?

Good eye! I had never noticed that before.
So, I started collecting empty Febreze cans for our next tutorial. The shape of the top fits nicely into the era of my #HBSCREATINCONTEST2015 room box.

There are four clips you have to get past to get the top of the can off. Al handled that for me. He tried prying with tools but in the end he said it was easier to just work it off by hand.

PLEASE DO NOT READ MY RULER.
I was making a second chair and I wanted to make the front bottom of the chair narrower. This makes the back of the chair lower, great for a bar stool but not for a dining chair.
Do you see the dark line on the plastic top where my ruler begins? This line goes all around the top. Use this line to measure from. Measure 9/16" up from that line. Again, don't read the measurement on my ruler.

I have made a dotted line around the top/chair.
I will be cutting that second chair for the pictures. I will then use my first chair for the rest of the tutorial.
 |
I am going to use a new blade in my craft knife and score a line on my drawn line.
Use light cuts first.

Please be careful. This stuff is tough to cut.
Hold your hand away from the blade when you are cutting.

I scored a deep line. I used my saw to finish cutting.
This cap did not fit under my scroll saw. For the first chair I used my husband's band saw. That was fast.
Cutting with the craft knife and miter saw will take a little time.

It's finally done.
At this time I want you to use 80 to 100 grit sand paper to rough up the inside and outside surface of the chair. Smooth the scratches out with 180 grit then 220 grit. Also, round off the bottom edge with the sand paper.
I tell you to do this later but you really need to do it at this point.
O.K., I am going to talk a little about painting the chair. I used craft paint, I roughed up the surface. That's what I always do. I have an idea, mind you I am writing this after I have finished the tutorial, I have seen spray paint for plastic at Lowe's and Home Depot. This is used to freshen up plastic lawn furniture. If I would have thought about it I would have tried this spray paint out. You might not have to sand the surface of the chair?? This is just an idea I am throwing out there, keep it in mind.

Here, I am showing you the difference in the height of the backs.
The chair on the left was cut using 9/16" from the line.
The chair on the right was cut using 11/16" from the line.
The chair on the right also has a dent in the top edge. That's what can happen if you use tools to pry off the top from the can.
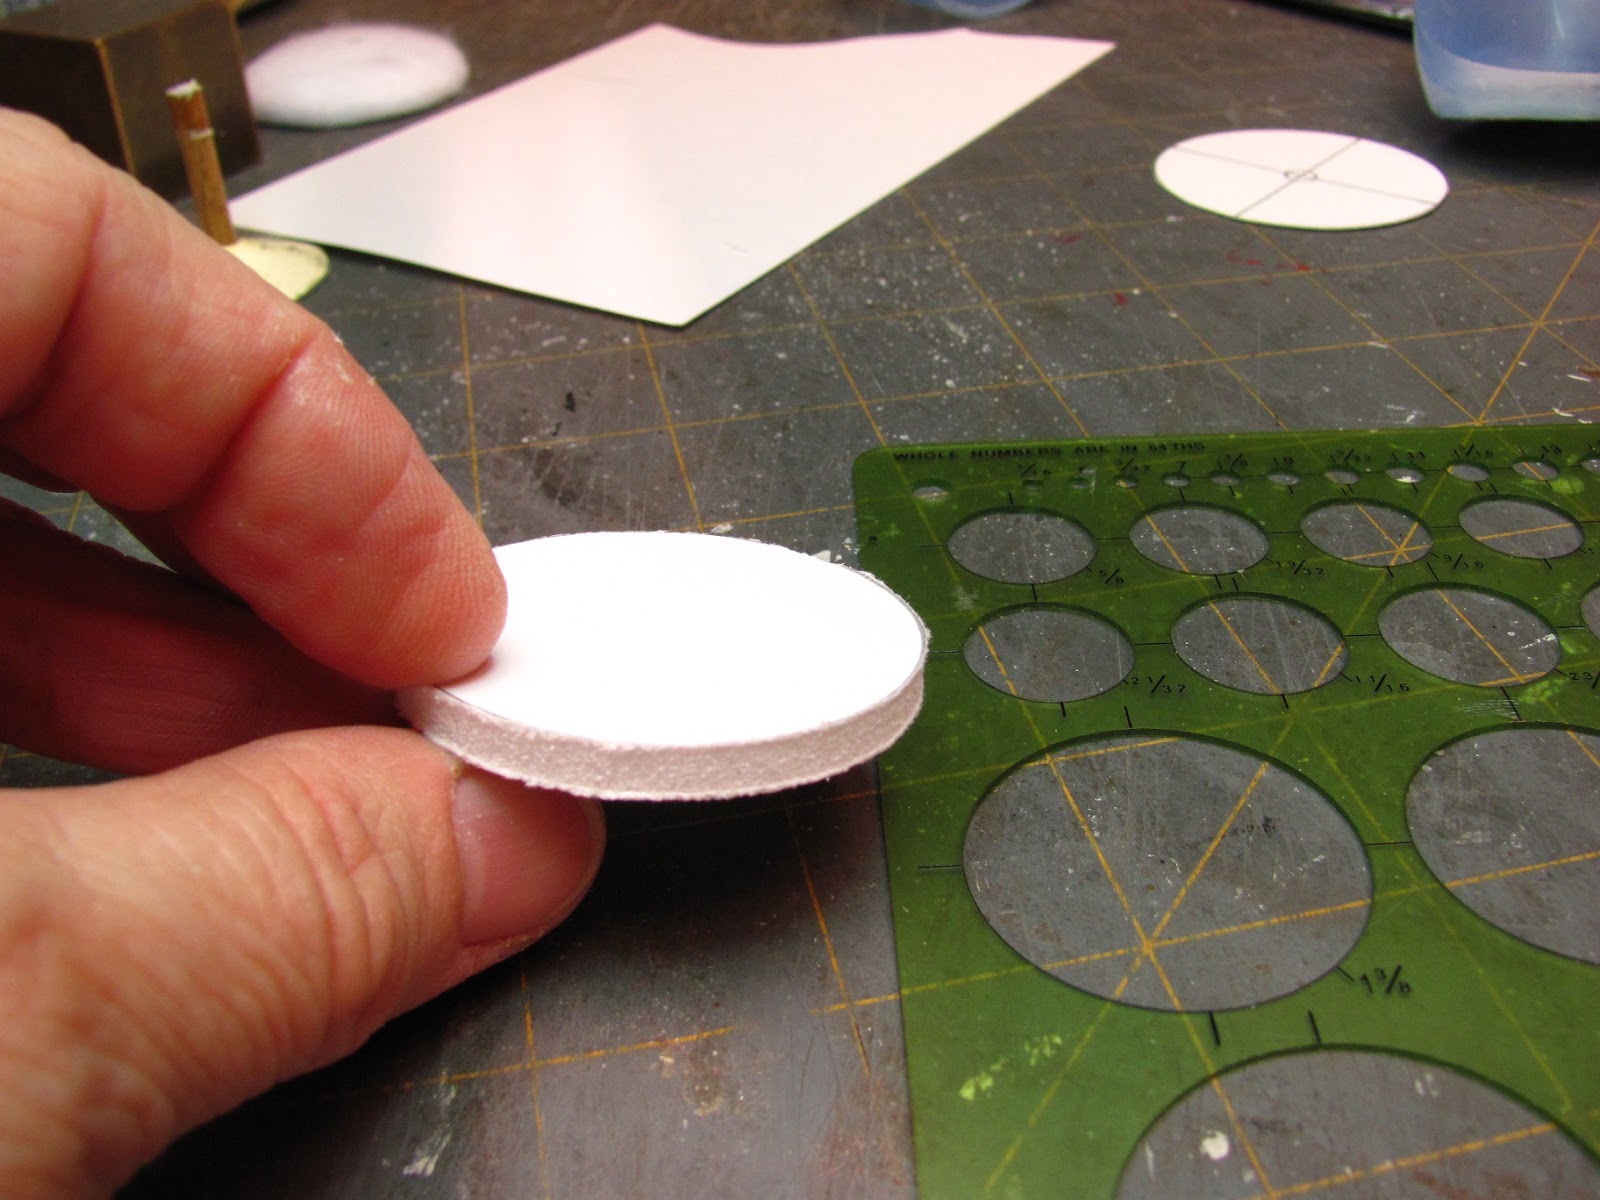
Cut from foam core a circle 1 3/4" in diameter. I used my circle template.
This should fill the inside seat area of your chair.
Dry fit, change if you need to.

I used tacky glue to glue the seat base into the chair.

Everybody measures differently so dry fit the foam core and make your adjustments.

Use the circle template again to make the bottom of the chair.
Trace a 2" circle onto card stock, mark the quarters and trace a 7/32" circle at the center.

Cut on one quarter line to the center and cut out the center circle.

Overlap the ends and fit the circle into the 1 7/8" hole in the template.
Glue the ends, I used yellow carpenter's glue for that.

Make another one.

I used yellow carpenter's glue to glue the two cones together.

This should fit on the bottom of the chair.
I applied yellow carpenter's glue to glue the cone to the bottom of the chair.

Cut from 3/16" dowel a piece 1 3/16" long.

After I glued the cone onto the bottom of the chair I sanded round the bottom edge. I used 80 grit for this, This stuff is tough. I smoothed out the scratches with 120 and 220 grits.
Although I am showing you the tacky glue I want you to use only the yellow carpenter's glue to fill the cones you will make.
This is another note after the tutorial was finished. I used both glues, using the tacky for the grab. It has yet to dry in two days time. I should have stuck with the carpenter's glue, no pun intended! So, when you see me filling the cones, you use only the yellow carpenter's glue, O.K.?

Fill the cavity.

Can you see where I sanded around the bottom edge? This is mentioned a couple of pictures above.
Put your leg into the hole.

Set your chair up on something so you can see to level the leg.
I would love it if you could leave this alone for a couple of days.
It's going to take a while for the glue to really dry in that cone.
Let's go on.

For the foot you will need to trace onto card stock 1 3/8" circles, mark the quarters and trace a 1/4" circle at the center.
Make two.

Cut circles out, cut to the center and cut the center circles out.

Overlap the ends and fit into the 1 1/4" hole in the circle template. Glue the ends together.

Apply yellow carpenter's glue to one cone and glue the two together.

From card stock cut a 1 1/4" circle using the template.
Apply yellow glue to it.

Put the cone on top.

Fill the cone with yellow carpenter's glue.

Put the chair into the foot.
The seat of the chair should measure 1 7/16", with the chair pad in the finished chair it will measure 1 1/2" high.
Also measure where the bottom of the chair is, the seam where the plastic and card stock meet. I am using one hand here so the measurement is not accurate.

I put the camera down and measured accurately.
I cut a strip of card stock the height of my chair.

Roll the strip up to fit into the 1 7/8" hole of the circle template and glue the card stock together.

It's going to be hard to keep the chair level, so I made a brace for it to sit on until the glue dries.
The glue will take a long time to dry.
Filling the cones with glue also added a little weight to the chair.

I put some weights on the chair for good measure.
We're old, we go to antique/flea markets and point out things to each other that our families had when were kids. I find these weights at places like that.

For a quick table I used mat board and my compass to draw two circles 3 1/2" diameter.

Glue the two pieces together using tacky for the grab. You may have to clamp the two pieces together until they dry.

Before you sand the edge round,
measure in from the edge 1 3/8", this is the bottom of the table.

Sanding on the bottom of the table, the side with the circle on it that you just drew . . . .
using 120 to 220 grit sand paper round the outer edge.

This is the rounded edge. The rounded edge will be the bottom of the table.

This time I glued two layers of card stock together before I started tracing circles.
With two layers of card stock glued together trace a 2 1/4" circle using the template. Mark the centers and trace a 7/32" circle in the center.

Cut the circle out, cut to the center and cut the center circle out.

Measure 1/16" away from a cut edge and draw a line from that mark to the top edge, drawing a wedge shape.

Apply glue and overlap the edges.

Apply yellow carpenter's glue to the bottom surface of the table inside the circle you measured earlier.

Set the cone onto the glue.

I squirted yellow carpenter's glue inside the cone.
(Not the tacky glue I am holding.)

See my clamps in the background, I used them to clamp the mat board together for awhile.
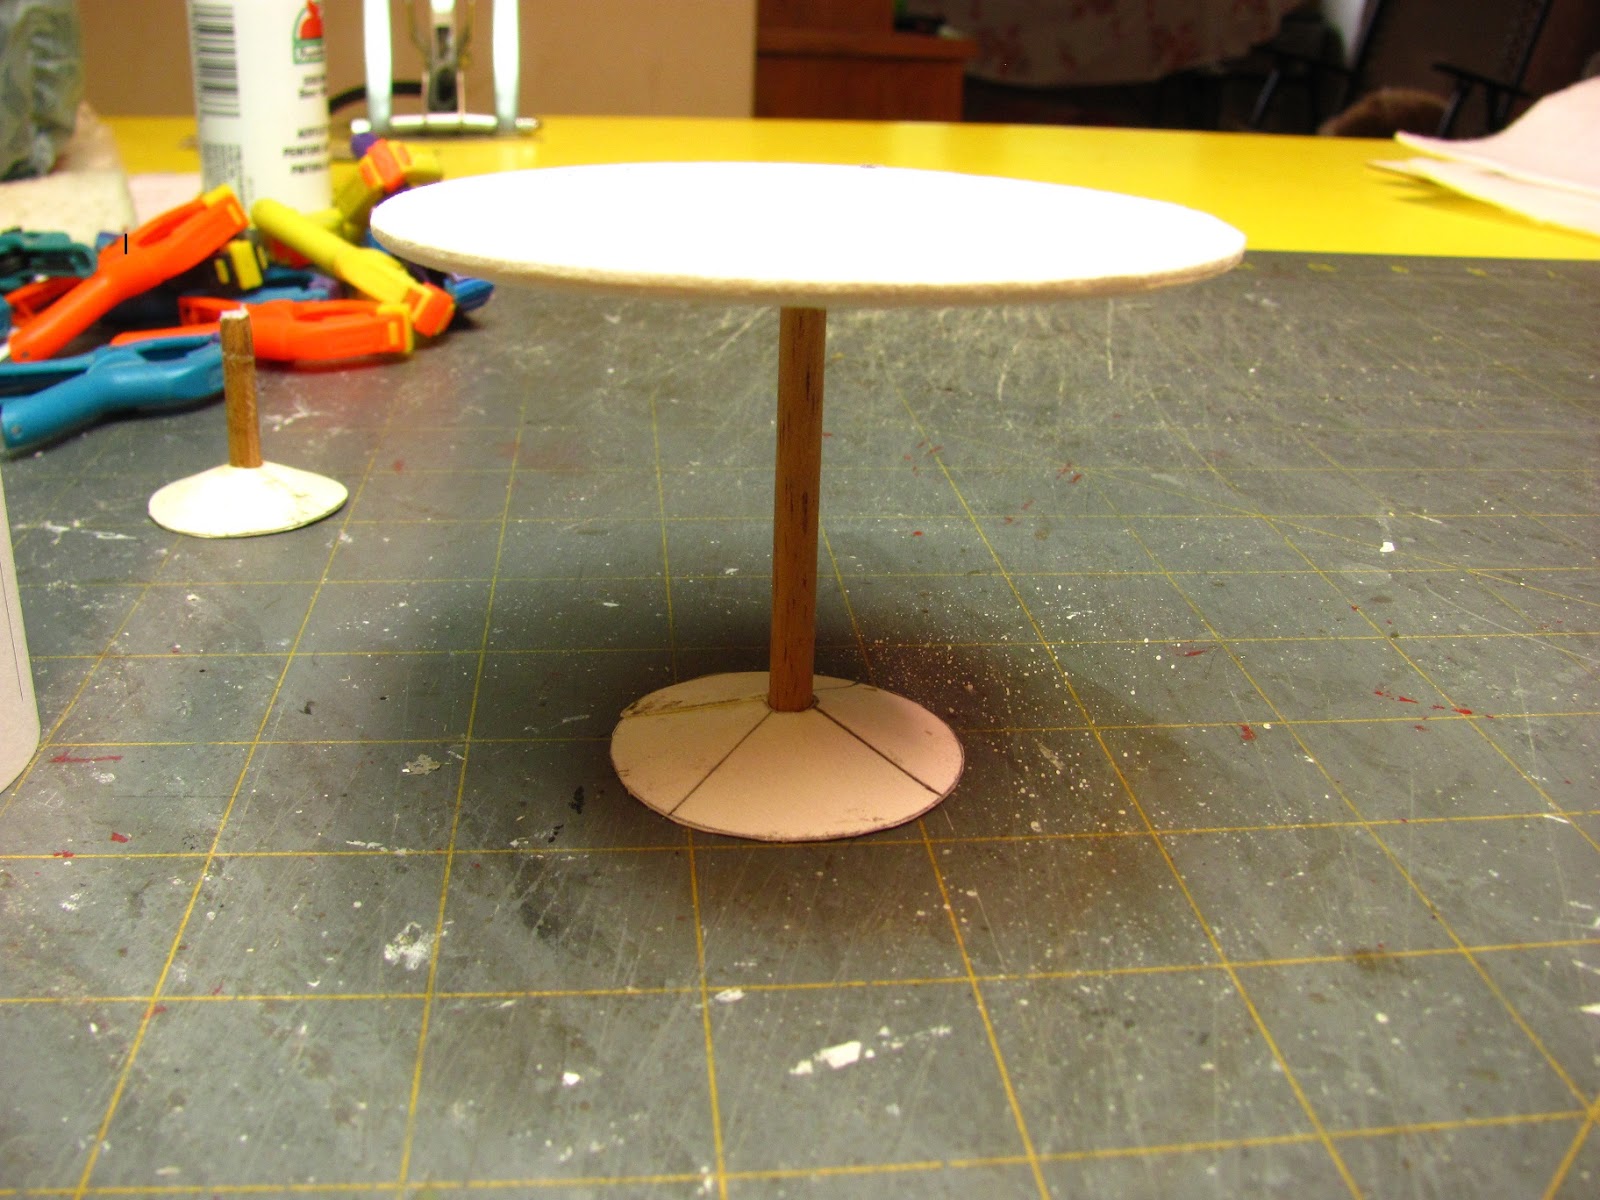
Cut 3/16" dowel 2 3/8" long for the leg.
Insert the leg in the center of the cone. Level the leg.

I am making a brace to hold the table level.
If our measurements are correct we can add 2 3/8" to 1/8" (the two layers of mat board) together and get 2 1/2". You can measure to check this.
Cut a strip of card stock 2 1/2" wide and wrap into a circle that's 2 3/8" diameter.

The foot is made from two layers of card stock glued together.
Trace a 1 3/4" circle, mark the quarters and trace a 1/4" circle in the center.
Cut to the center and cut out the inner circle.

Apply glue to the cut edges and fit the circle into the 1 5/8" hole of the circle template.

From card stock trace a 1 5/8" circle and cut out for the bottom of the foot.
Apply yellow glue.

Put the bottom and top of the foot together.
Use yellow carpenter's glue to fill the cone not the tacky glue I am holding.
Just a note: I want you to fill these cones with glue.
Insert the leg into the center hole of the foot.

Set the table into the brace.
I will put a little weight on the top to press everything together.
Would be great if you could wait to paint the chair and table for a couple of days.

As I mentioned at the beginning I am using craft paint. I am going to thin the paint out. I find that thin coats of paint on plastic are better than thick coats.

I have some sticky wax on a stick for a holder for my chair.

I will let this paint dry and paint a couple of more coats.
I won't sand, the paint is thin enough that it will level itself and be smooth.

For the seat cushion trace a 1 3/4" circle onto foam core and cut out.

I use Thermolam Plus, NOT the fusible, be sure to look at the label. I buy this from Wal-Mart or Joann Fabrics.
Cut a circle a little smaller than the foam core.

Spread some tacky glue onto the foam core and press the Thermolam onto it, in the center.

Now, cut a piece that will cover the circle and over the edge.

Apply tacky glue to the edge of the foam core and press the Thermolam down. Trim off the excess Thermolam.
Cut a circle of fabric larger than the seat cushion.

Use a needle and a doubled thread to sew a running stitch around the edge of the fabric.

Put the seat cushion into the circle of fabric and pull up the thread tightly.

I will sew around the edge again and then knot off.
Spread the gathers around to smooth out the fabric.

I know I took a picture of gluing under the fabric but I don't know where it went!
So. . . Apply tacky glue under the fabric and press the fabric into the glue.
Trim off the excess fabric. This makes less bulk under the seat cushion so it's easier to glue to the seat base.

So, here's the little chair that Al thought of!

I know it's not exactly Eero Saarinen but I think it's close.

I think the toughest part will be getting the top off the can and cutting the top apart. The chair really came together rather quickly.
I hope everyone is having a good summer, so far. When you get a minute send me your pictures of finished tutorials at: camceiling@frontiernet.net. That is also the address for any questions you might have.
TTUL,
Kris
Have fun, Expand on it, Make it better . . . . .
Just keep making minis!!
Subscribe to:
Posts (Atom)